Showing posts with label decor. Show all posts

Monday, August 1, 2011

Pinterest Challenge July 2011 | Project Results


The above photo was the inspiration for my project.  It originated from Addicted 2 Decorating.  I repinned someone elses pin, from a blog feature on Classy Clutter. Wow, you could totally play "seven degrees of Pinterest".  Back to the challenge...

 The week before the challenge was issued I had begun a little dining room makeover and was contemplating repainting this cabinet.


The room was getting a new coat of paint and going from Valspar City Storm to Benjamin Moore's Gray Owl.  You can see the City Storm color in the above shot and will see Gray Owl in the room in photos below.  I began to think about the turquoise piano I pinned 6 weeks ago and a lightbulb went off that I did not have to have a piano to recreate the look but could do it with my red cabinet.  I was not sure exactly what color was used on the piano so in the end I custom blended my own turquoise color. 


After I got the color just right, I painted the outside the teal/turquoise and the inside black.  I then worked on the back panel that I did a faux bois treatment on.  Get more detailed information about how I custom mixed the color, what colors I used and how I did the faux bois here.


While waiting for the paint to dry I began to work on the plate part.  First I laid out the plates to get an idea of what I wanted. For more detailed information about the hanging plate part, click here.


After getting the layout right, which took a few days of moving, photographing and lots of head tilting, I moved on.  I then rolled out craft paper and laid the plates down again and traced around the outside to make a pattern of sorts.


I planned to hang up the pattern above the cabinet to make sure that I liked the placement.
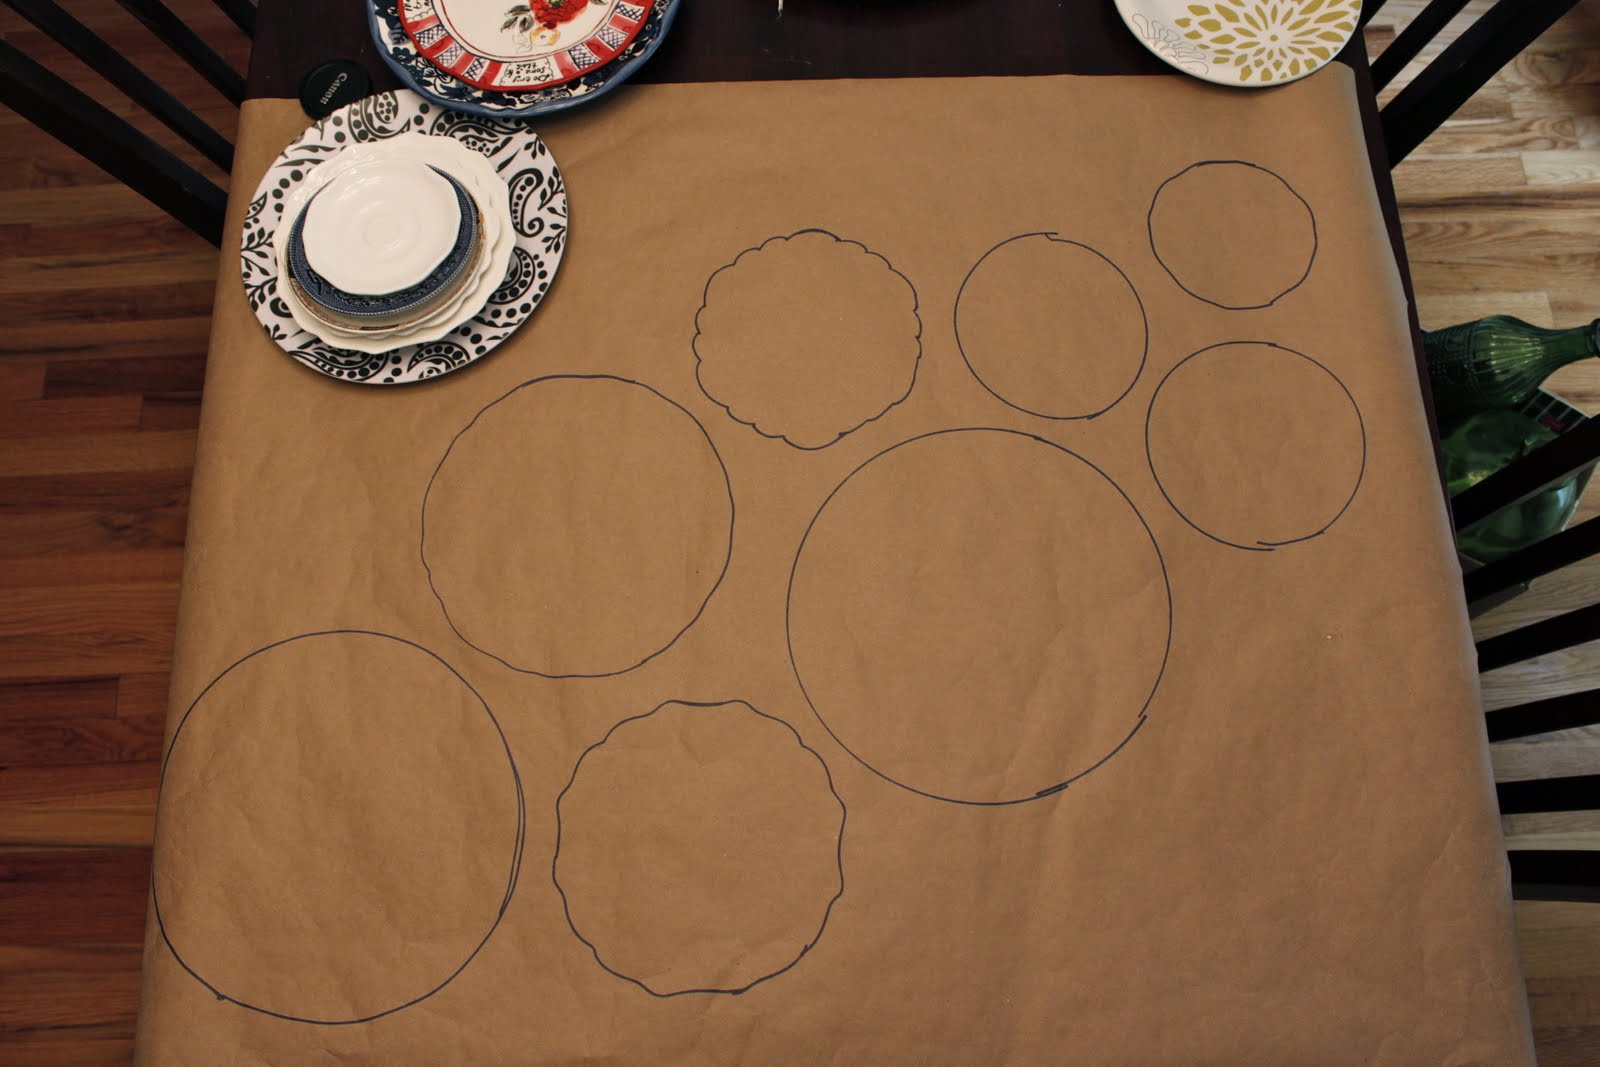

This is probably the third pattern I made.  I lived with it for a day taped to the wall above the cabinet before I began hanging plates.  I am so glad I did this step because they really looked different on the wall.  I used much bigger plates that the inspiration photo which is good and bad.


Next came plate hanging hooks {came with the plate hangers}.  The whole plate hanger part of this is a whole other issue/story for another time. If you want to know more about it, click here for details. Anyway, I hung the hooks and then placed the plates up.
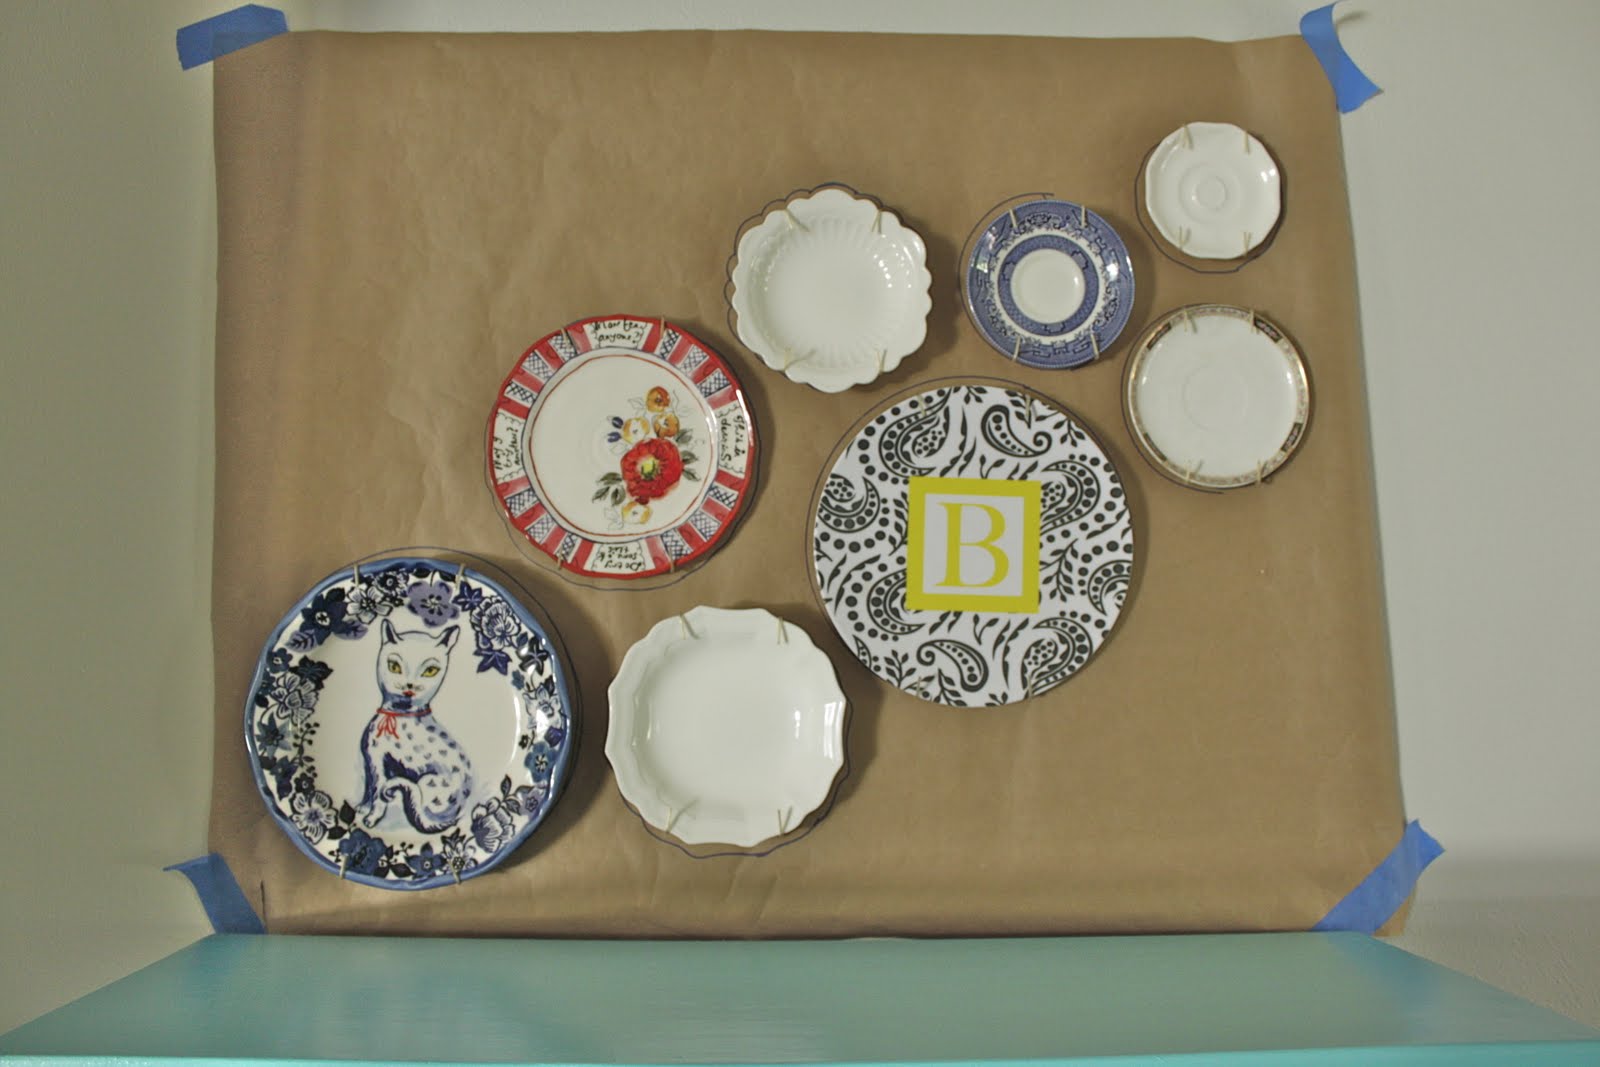

Then it was time for the paper to come down!


Back up the plates went!


I had been playing with different accessories for the top of the cabinet and decided to go with these CB2 vase/candle holders I have had for several years.  I also have white Zgallerie pillar candle sticks that look good that could be a future option.  I liked the lighter visual weight that the glass has since the plates are big.


Since living plants cannot survive in my home due to two furry inhabitants I just cut a few herbs and plants from the yard.


Please ignore the crazy long plate hangers!  I am going to replace/snip them down.  I really wanted to get the project done, so this had to do for the time being. For more information about the plate hangers I used, click here.


Now for a side by side comparison from the inspiration and my completed project!

There are a few changes I plan to make such as changing/modifying the plate hangers as I have already mentioned; adding or swapping plates; changing the wicker vase next to the cabinet; and maybe different knobs on the cabinet.  I love the end result!

Wednesday, July 27, 2011

Pinterest Summer Challenge!

I am so excited about this challenge!  I have the perfect idea for a dining room project obviously inspired by Pinterest.  It is probably my most loved pin.  ever.  So excited!!!

Not sure what I am talking about?  Check out YoungHouseLove, Emily Henderson, BowerPowerBlog, or Making a House a Home.

Wednesday, January 20, 2010

12x12 paper lovelies...

After my last post about Paper-Source I decided to peruse the papers to see about that lovely damask print paper for fun liners and wrapping gifts.  While I was not able to find that paper, I did find many other lovelies that I have not seen before. 

I love the idea of creating inexpensive artwork by framing beautiful paper.  It creates an impact and as I mentioned can be very cheap!  Here are some 12x12 paper lovelies that are....well....just lovely!


I love how affordable a single sheet can be!  Also think about how simple it could be to create your own pattern to frame by using a rubber stamp to repeat your design.

Friday, January 8, 2010

home office storage


{Timber Buffet from Target}
I have been wanting a piece of furniture to house our printer, laptops, mail, etc.  for a while now.  After much searching online and locally I finally decided that our best option was the Timber Buffet from Target.  The biggest downside is that I had to order online so it still has not arrived {I ordered it January 3rd}.  The space below is perfect, or at least the measurements seem perfect, for our printer and 2 laptops, our external hard drive and other items.  The space above will be perfect for some basket to organize the mail.

I am getting the space ready as it currently contains a super amazing antique travel trunk that I acquired from my grandparents who got it from another long ago relative. I love this trunk!  It just is not practical for anything other than putting things on...So the trunk was holding many, many magazines, mostly wedding magazines.

I love these magazines and am having a hard time parting with them, so I am going through and removing my most favorite pages and then will reuse the mags for an awesome project at work.

I cannot wait for the furniture to arrive, just another step in my quest to become organized!

Tuesday, December 15, 2009

Frankie and the Christmas Tree


I love my little Frankie. I love his occasionally crossed eyes and all! He is my little cuddle-bug and is always happy to see me when I come home.


Frankie is a talker, a feline trashcan {he eats anything....anything}, and a destroyer of all Christmas trees.  No matter how much I love him,  the fact that I cannot even get my Christmas tree decorated has me peeved.  Tonight, I came home and there was a large gap in branches on the tree as if a cat had taken a nap in the tree.  While I do not have physical proof of Frankie being in the tree, I would bet money that he did in fact take a nap in the tree.  Looking at the amount of droop in the branches, it appears that it was a very long nap.

Good thing Frankie is cute and likes to cuddle.

Thursday, December 10, 2009

Oh Christmas tree!

I was so very excited to get our tree this year.  Chris' family has been cutting down their tree's Thanksgiving weekend, from the same tree farm for over 20 years.  For the past three years I have been a part of this tradition. This year we went the Friday after Thanksgiving.

I was determined to find the perfect tree this year.  Year one we got a white pine...long soft needles, very light in weight with flimsy branches.  Since this was the first tree that I got to decorate all on my own, I went a little crazy with ornament purchasing...the poor tree could not hold many of my heavy ornaments. Our kitten at the time, Scout, pretty much left the real tree alone, but fell in love with my 4 foot pre-lit white tree...after much abuse, the white tree has been retired.  Year two, I picked a beautiful Fraser Fir.  It was pretty, but too round for our small living room. We also added an addition to our family in the form of a tree-climbing kitty named Frankie.  He loved climbing the Fraser. We have always wanted a slim tree, but narrow trees were not available.  This year, we were able to go to a small area with new trees that were a little more pricey.  We selected a Canaan Fir.  It is perfect.  I wish I could take the credit for picking it, but my MIL actually found it.  She has much more tree picking experience than me!  Frankie is limiting his contact to nibbling the tips of the branches, and Scout leaves it alone. 

So the tree has been undecorated, unlit in the living room for almost two weeks.  I finally put the lights on...my least favorite part. I bought 2 strands of these really pretty lights to mix it up a bit, but part of one strand it out.


{via Target}

I love the way they look with the regular lights.  I did not put on very many strands since I dislike putting the lights on so much.  I am too impatient!

On another note, I received a Winter scented candle from my MIL.  It is such a wonderful smelling candle...I think it has really gotten me into the tree decorating mood! I smell "tree", so I looked it up and it "is a festive blend of shimmering pine, crisp bay leaf, red cinnamon and warm winter woods"


We have been burning this candle the last few nights and it is just so perfectly holiday-ish.
 

Wednesday, December 9, 2009

Rehearsal Dinner Recap

Our rehearsal dinner was at the beautiful Spink Pavilion at the Missouri Botanical Gardens.  I loved the pavilion in the dead of winter...freezing cold!  So I had visions of perfection for June!  The weather was gorgeous.  Catering St. Louis is the caterer for MOBOT, and food was delish! I have blogged about the rehearsal dinner a few times and specifically about Spink here.
So now for the pro pics.  As always, all photos are from Clary Pfeiffer Photography.


Monday, November 30, 2009

Dear Santa,


This would be perfect for a wedding picture! I love birds, love white on white frames.  I would like this please Santa. :)

As a side note, my 4 yr. old nephew has been perusing catalogs and "signing up" for what he wants for Christmas.  He makes some sort of markings and "sign's up"!  Too cute. 

Saturday, September 19, 2009

haute halloween

{Rosanna Inc.}

I love this website! They have such beautiful and fun items. I am still in love with this that I have blogged about, and maybe one day I will get it! I am excited about the black ceramic items, I already have the small cake plate and the black teapot. I would love the medium size black cake plate to do a little mix and matching with my martha cake stands. I have the round set and the square set. I love cake stands!

So how cute would these cake stands be with some cupcakes decorated with candy corn or halloween candies? So fun!

Sunday, July 12, 2009

French Memory Refreshed! DIY in under 30min.

This french memory board needed a makeover. Something a little more special but not too much going on that it takes away from what it may display...

This project cost $0 as I used items that I already had. That is the best kind of makeover! I cannot believe how fast this project went...it will go even faster if you gather all your materials and have the hot glue gun plugged in and ready!

I removed the covered buttons on the top and saw that they were glued on over staples. I then removed the backing and had to reattach the small wooden pieces where some of the staples would hit. I used ATG taped to help it stick.

Black grosgrain ribbon with a white boarder was applied to the front and stapled in place.

I then used buttons that were intended for a winter coat {hello! its summer, who cares about new buttons!} and hot glued them where the ribbons crossed.

The buttons did not have a flat back...which caused them to not lay flat. I like the design on the buttons, so we will give it a whirl. They are glued pretty securely, so they should hold up just fine.
The refreshed french memory board may find a home in the new kitchen! Since the fridge is off limits, it would be great to display invitations and pictures {on a wall...away from the reach of Frankie!}
Related Posts with Thumbnails